Page 1
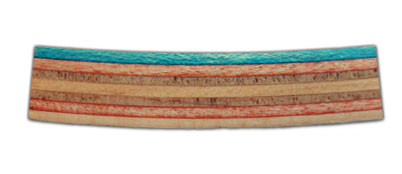
VENEERLet's start with veneer. Skateboard veneer can be broken down into three categories of plys.Face plys, sanded or unsanded core plys and cross band plys which are generally unsanded. The way that you orient these different layers changes a board's strength, weight and feel.A common method of arranging the plys or layers would be...1. Face2. Core layer3. Cross band4. Core layer5. Cross band6. Core layer7. FaceGLUE It's best to apply the glue with a paint roller. Preferably one with a short nap that is no wider than 4" in width.The amount of glue that you apply is critical and may vary with each type of glue. I usually use about 3 ounces per veneer ply if the roller is dry and 2 ounces per veneer ply if the roller is already wet with glue. You also need to have an even coat which has not dried in any spot during the glue up process.The number one problem during skateboard construction is delamination, which can usually be traced back to an improper glue up. So work quick and make sure you apply enough glue to your veneer.
MOULDSThe veneer is then placed into a skateboard mold which with the help of a press, will force the veneer into the desired shape. There are a variety of these from foam, wood, aluminum and concrete.PRESSThe veneer is then placed into a skateboard mold which with the help of a press, will force the veneer into the desired shape. There are a variety of these from foam, wood, aluminum and concrete.Once your skateboard deck has been removed from the mold, let it cure for an additional 24 hours before you do any more work on it. This allows both the glue and wood to completely dry.DRILL HOLESYou want to drill your holes for the truck mounting hardware with a drill press. You can also use a standard drill, but you must make the holes as perpendicular to the deck as possible.To locate the holes, you can use an old deck for a template or you can measure to find your true center of your deck, determine your wheelbase, then go from there.
Shaping the deck is often accomplished by using another deck as a template. Trace the deck onto your uncut blank so you can see where to cut. Use a band saw or jig saw to cut out the deck.The way a skateboard deck gets it's radiused or rounded edges can be achieved by using a router or a lot of sanding.Once you've gotten the edges taken care of, you'll want to sand your skateboard deck. It is helpful but not necessary to use an orbital sander.Once the deck has been sanded smooth, use a tack cloth to remove the saw dust left behind. A tack cloth is essentially cheesecloth coated in a particular kind of wax. It works very well and I highly suggest using one.Now that your deck is smooth and clear of debris, you're ready to seal it.There are many different products you could use here, from Deft Lacquer to specialty products like Gemini Coatings WB-0230. I have found that Deft (also available in an aresol spray) works well, but smells horrific and yellows slighly over time. Gemini Coatings WB-0230 on the other hand, is a professional grade product and performs as such. It also has a much lower odor and resists yellowing.
After you've applied the sealer, you can move on to the graphics.Stencil, spray paint, free hand or screen print... it's up to you. Just make sure that you use a paint with the same base as your sealer and final coat. What I mean by that is, if your sealer is water based, use a water based paint. If your sealer is solvent based, use a solvent based paint.Once you have finished your graphics and you've left them to dry overnight or longer, take your tack cloth and wipe down the deck.Using a clear coat, (the sealers mentioned above) cover the deck and let it dry. Depending on the product, you may want to give your skateboard several more coats of finish (check with the manufacture).
Skateboards 1
Skateboards 2
Want to create your own Notes for free with GoConqr? Learn more.